
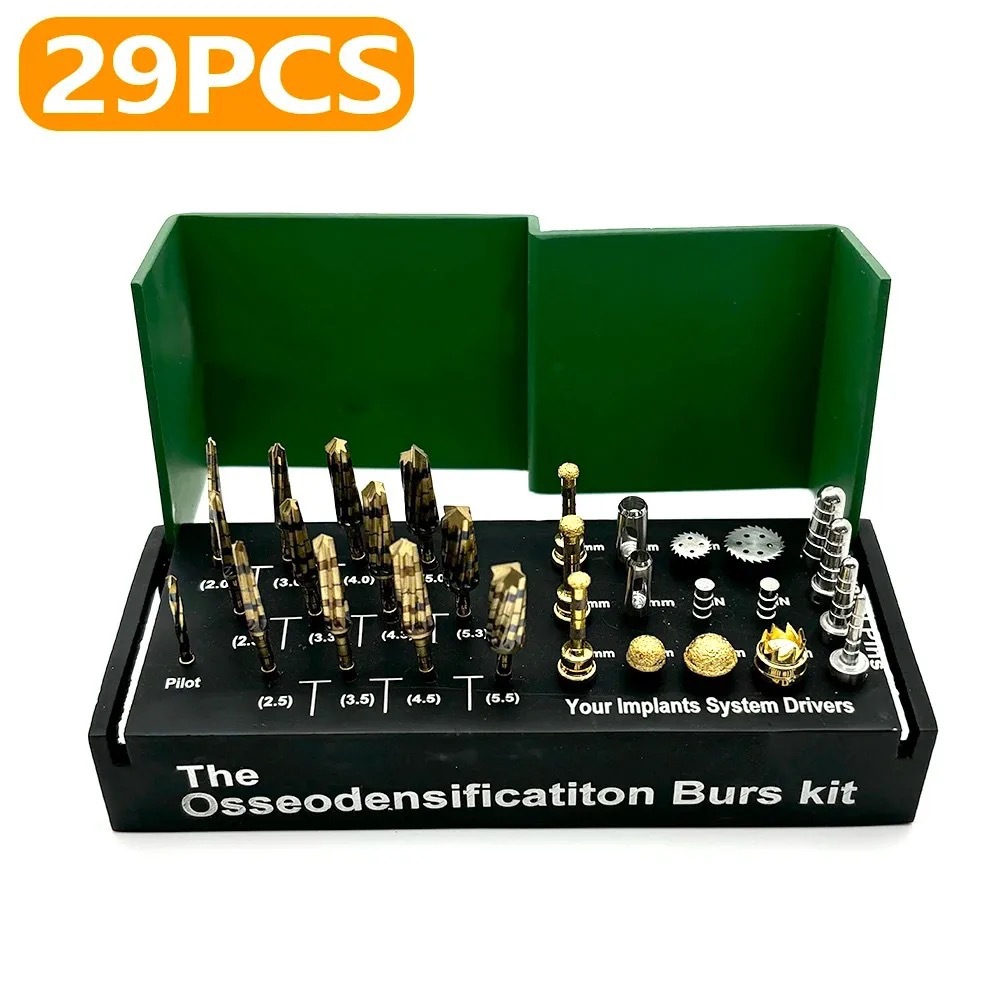
Dental implant drill kits may contain multiple diameters, lengths, depth markings, stoppers and drivers. Similar-looking components are not automatically interchangeable, and an unclear marking can create a purchasing or inventory error. This dental implant drill bit size and depth stop compatibility checklist helps trained dental professionals review product specifications before ordering.
This article provides purchasing and product-information guidance only. It is not a clinical drilling sequence or treatment protocol. Always follow the implant system, instrument manufacturer and facility requirements.
Start With the Intended Implant System
Identify the exact implant system, surgical kit and workflow for which the instruments are intended. Confirm compatibility through current manufacturer documentation, not only a reseller title or visual resemblance.
- Implant manufacturer and system name
- Connection or guided-surgery platform
- Required drilling sequence
- Handpiece and shank requirements
- Depth-control method
- Current instrument reference numbers
Diameter Markings Need a Clear Reference
A drill may show a nominal diameter on the shaft, tray or packaging, but the meaning of that number must be confirmed in the product documentation. Request a complete size chart linking each instrument, marking and reference number.
| Item | What to verify |
|---|---|
| Nominal diameter | Exact units and instrument reference |
| Tip design | Whether the tip diameter or cutting profile differs from the nominal body size |
| Color code | Whether colors identify diameter, sequence, length or another property |
| Tray position | Whether the printed slot accurately corresponds to the supplied drill |
| Replacement drill | Whether markings and reference numbers match the original kit generation |
Working Length vs Overall Length
Overall instrument length and working or cutting length are not the same measurement. A listing should state which dimension is being quoted and where it is measured from. For guided workflows, additional components can change the effective relationship between markings and intended depth.
Ask for a dimensioned technical drawing when possible. Do not estimate length from a product photo.
Understand Depth Markings
Laser bands, grooves or engraved numbers may indicate different depths depending on the drill design and system. Confirm:
- the reference point from which depth is measured;
- whether markings indicate the top, bottom or center of a band;
- whether the drill tip is included in the stated depth;
- whether markings apply to freehand or guided use;
- whether visual wear can make markings difficult to read;
- what inspection criteria require replacement.
Do not transfer the interpretation of markings from another brand or drill generation.
Depth Stop and Drill Stop Compatibility
Mechanical stops can be integrated, removable or part of a guided sleeve system. A stop that fits over a drill is not necessarily validated for its diameter, length or workflow.
- Match the stop reference number to the exact drill.
- Confirm intended depth and measurement reference.
- Check orientation, locking and retention features.
- Verify whether the stop is reusable or single-use.
- Review cleaning and sterilization instructions for both parts.
- Confirm that stop thickness or sleeve height is included in system calculations.
Shank and Handpiece Connection
Diameter and length compatibility do not establish that the drill fits the intended handpiece. Verify shank type, dimensions, latch or friction-grip design, maximum operating limits and manufacturer compatibility. Never modify a shank to make it fit.
For a broader review, read WongTech’s Dental Implant Drill Bit Set Compatibility Checklist.
Tray Labels and Component Mapping
A well-organized tray can reduce selection errors only when its labels match the supplied components. Before purchase, request a complete inventory and compare it with the tray diagram.
- List every drill, stop, driver and accessory.
- Record its diameter, length and reference number.
- Match each component to a labelled tray position.
- Check whether replacement parts use the same color coding.
- Confirm whether the case is an organizer or a validated processing tray.
Inspect Markings Before Use and Reprocessing
Follow the manufacturer’s inspection criteria. Markings that are worn, obscured or inconsistent with the package reference can make identification unreliable. Also inspect cutting surfaces, shanks, stops, drivers and tray labels.
For reprocessing questions, use our Dental Implant Drill Bit Cleaning and Sterilization Checklist.
Questions to Ask the Seller
- Can you provide a complete diameter and length chart?
- What does each laser band, groove or color indicate?
- From which reference point is length measured?
- Are the drill tips included in the stated depth?
- Which depth stops fit each drill reference?
- Is the set intended for guided or freehand use?
- Which implant system and kit generation is documented as compatible?
- Are individual replacement drills and stops available?
- Do the tray labels match the included components?
- Can you provide current instructions for use and reprocessing?
Warning Signs in a Product Listing
- No exact diameter, length or reference-number table
- Only color names without an explanation
- Depth markings visible but not defined
- “Universal” compatibility without manufacturer documentation
- Mixed product generations in photos
- Stops shown without matched drill references
- Tray labels inconsistent with written package contents
- Unverified sterile, FDA or CE claims
Frequently Asked Questions
Does a 3.5 mm marking mean every 3.5 mm drill is interchangeable?
No. Tip design, working length, shank, sequence, system reference and depth-control features can differ.
Are color codes standardized across implant systems?
No. Colors can represent different properties and should be interpreted only using the exact manufacturer documentation.
Can any depth stop fit a drill with the same diameter?
No. Match the stop, drill reference, intended depth and locking design exactly.
Is overall drill length the same as drilling depth?
No. Overall, working and effective depth measurements can differ. Confirm the defined measurement reference.
Can worn laser markings still be used?
Follow the manufacturer’s inspection and replacement criteria. Unclear identification is a reason to remove a component from service until properly evaluated.
Does a storage box automatically function as a sterilization tray?
No. Confirm the tray’s intended use and validated reprocessing instructions separately.
Final Pre-Order Checklist
- Exact implant system and kit generation confirmed
- Complete diameter and length table obtained
- Working, overall and effective lengths distinguished
- Laser bands, grooves and colors clearly defined
- Depth stops matched by reference number
- Shank and handpiece compatibility documented
- Guided or freehand workflow identified
- Tray labels mapped to all components
- Replacement-part availability checked
- Instructions and reprocessing documentation available
Review WongTech’s 29-Piece Dental Implant Drill Bit Set and browse our Health Devices. For related product information, read How to Use an Osseodensification Burs Kit for Dental Implant Site Preparation. Before ordering, review the Shipping Information and Return & Refund Policy.
Target keyword: dental implant drill bit size and depth stop compatibility.
Suggested image alt text: “Dental implant drill bit size markings and depth stop compatibility checklist.”
For trained dental professionals. Always follow current manufacturer instructions and applicable facility requirements.