
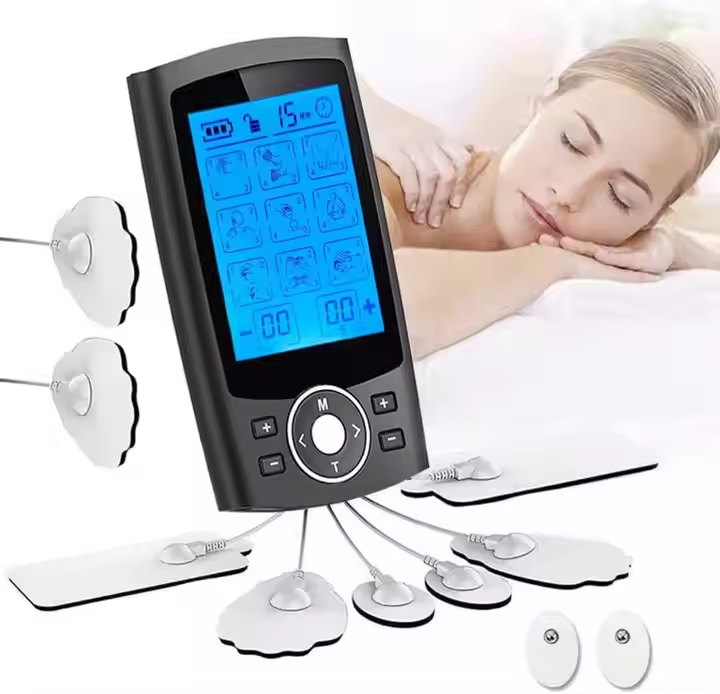
A replacement lead wire can look similar to the original cable while using a different device plug, electrode connector or internal specification. An incorrect cable may not fit securely or operate as intended. This TENS lead wire compatibility checklist explains what to compare before ordering replacement wires for a TENS/EMS muscle stimulator.
This article provides general product information only. Use accessories identified by the device manufacturer as compatible and follow all supplied safety instructions.
Identify the Exact Stimulator Model
Begin with the complete brand, model number and generation printed on the device or manual. Do not buy by appearance or by a broad label such as “universal TENS cable.” Manufacturers may change the output socket between visually similar versions.
- Record the complete model and any suffix.
- Check how many output channels the device has.
- Locate the original accessory or replacement-part number.
- Review the current manual or manufacturer parts list.
- Confirm whether the connector specification differs by region or production version.
Compare Both Ends of the Lead Wire
A lead wire connects the stimulator to one or more electrode pads. Both ends must match.
| Connection point | What to verify |
|---|---|
| Device end | Plug shape, pin count, diameter, spacing, insertion depth and keyed orientation |
| Electrode end | Pin, snap or another connector type and its exact dimensions |
| Branch design | Single lead, split lead, number of pad connections and channel arrangement |
| Cable specification | Manufacturer part number, intended device and permitted electrical characteristics |
Common Electrode Connector Styles
Reusable electrode pads commonly use pin-style or snap-style connectors, but these labels alone are not enough. Pin diameters and snap dimensions can differ. A loose connection can separate during use, while forcing an incorrect connector can damage the pad or wire.
Check our TENS/EMS Electrode Pads Compatibility Checklist when selecting pads and wires together.
Device Plug Size and Shape
Measure only when the manufacturer documentation permits and provides a reference. A marketplace description such as 2.0 mm, 2.5 mm or 3.5 mm may refer to different parts of a connector and may not fully describe its wiring. Photos can also distort scale.
The safest confirmation is an exact replacement-part number or written manufacturer compatibility statement for the device model.
Channel and Branch Configuration
A dual-channel stimulator may use one cable per channel, with each cable branching to two pads. Other designs may use a different number of connections. Confirm:
- how many lead wires the device needs;
- how many pads each wire connects;
- whether channels are adjusted independently;
- whether the original cable is color coded or keyed;
- whether an adapter is permitted by the manufacturer.
Do not split an output using an unapproved adapter merely to connect additional pads.
Polarity and Special Connector Features
Some lead wires or electrodes have marked polarity, keyed plugs, locking features or proprietary connections. Do not remove, modify or bypass these features. Match the markings and orientation described in the manual.
If a cable fits only when forced, stop. It may be the wrong connector or orientation.
Cable Length and Daily Use
Length affects practical placement, but a longer cable is not automatically compatible. Use the length range or replacement cable specified by the manufacturer. Excess cable can catch on clothing or equipment, while a short cable may pull on the electrode connector.
- Check the stated total and branch lengths.
- Confirm the cable reaches permitted pad locations without tension.
- Avoid tightly coiling or sharply bending the wire.
- Keep connectors away from liquids unless the instructions permit exposure.
Inspect a Replacement Wire Before Use
- Compare the part number and compatibility statement.
- Check both connectors for bending, corrosion or contamination.
- Inspect the full cable for cuts, cracks, exposed conductors or sharp kinks.
- Confirm branches and strain reliefs are secure.
- Connect only while the device is off and intensity is at zero.
- Insert and remove the plug as directed, holding the connector rather than pulling the cable.
Signs a Lead Wire Should Not Be Used
- Exposed conductor or damaged insulation
- Bent, loose, corroded or contaminated connector
- Plug does not fit securely
- Intermittent output when the cable moves
- Cracked branch junction or strain relief
- Unknown model or absent compatibility information
- Evidence of an improvised repair
Do not repair an electrical-stimulation lead with household tape, solder or replacement plugs unless an authorized procedure specifically permits it. Replace questionable accessories according to the manufacturer guidance.
Questions to Ask Before Ordering
- What exact device models is this cable intended for?
- What is the manufacturer replacement-part number?
- What connector is used at the device end?
- What electrode connector type and dimension is used?
- How many branches and pads does each cable support?
- What is the total and branch length?
- Are polarity, keying or locking features present?
- How many cables are included in the package?
- What inspection and replacement instructions apply?
Product and Package Review
Review the accessory and package information for WongTech’s TENS/EMS Muscle Stimulator – 24 Modes. Product photos may show several wires and pads, so compare them with the written contents list before ordering.
For device-program information, read TENS vs EMS Modes: What to Compare Before Buying.
Frequently Asked Questions
Are TENS lead wires universal?
No. Device plugs, electrode connectors, branch layouts and specifications vary by manufacturer and model.
Can I use a cable that physically fits the socket?
Physical fit alone does not confirm compatibility. Verify the exact device and replacement-part specification.
Are pin and snap electrode connectors interchangeable?
No. They use different connection styles. Match the pad and lead-wire connectors exactly.
Can I use an adapter for different electrode pads?
Only if the device manufacturer explicitly permits the exact adapter and configuration.
Why does output stop when the wire moves?
The cable, connector, pad or device may have an intermittent connection. Stop use, switch off the device and follow the manufacturer’s inspection and support guidance.
Can a damaged lead wire be taped and reused?
Do not use improvised repairs. Replace damaged electrical accessories with an approved compatible part.
Final Compatibility Checklist
- Exact stimulator model confirmed
- Approved replacement-part number identified
- Device-end plug matched
- Electrode connector style and dimension matched
- Channel and branch configuration confirmed
- Polarity or keying features checked
- Cable length appropriate and manufacturer-permitted
- Package quantity confirmed
- Cable inspected before connection
Browse WongTech’s Health Devices and read our TENS Electrode Pad Care Guide. Before ordering, also review the Shipping Information and Return & Refund Policy.
Target keyword: TENS lead wire compatibility.
Suggested image alt text: “TENS lead wire and electrode connector compatibility checklist.”
This article provides general product information and does not replace manufacturer instructions or professional medical advice.